If you manage more than a few booking services on Cowlendar, you already know the pain: you update one setting, then have to repeat the exact same change across every other service manually. Bulk edit exists specifically to fix that.
With this feature, you configure one service exactly the way you want it, then copy any combination of its settings to as many other services as you choose. One action, done.
When to Use Bulk Edit
This feature is especially useful when you need to:
- Apply the same availability schedule across multiple services
- Update notification settings store-wide after changing your email setup
- Push a new cancellation or rescheduling policy to all services at once
- Sync buffer times, booking limits, or slot lock settings after a policy change
- Add the same custom questions or contact fields to several services simultaneously
Step-by-Step: How to Bulk Edit Your Services
Step 1 - Configure the Source Service First
If you need to update a service before bulk editing, go to My services, click Edit on the service you want to use as the source, and save your changes.
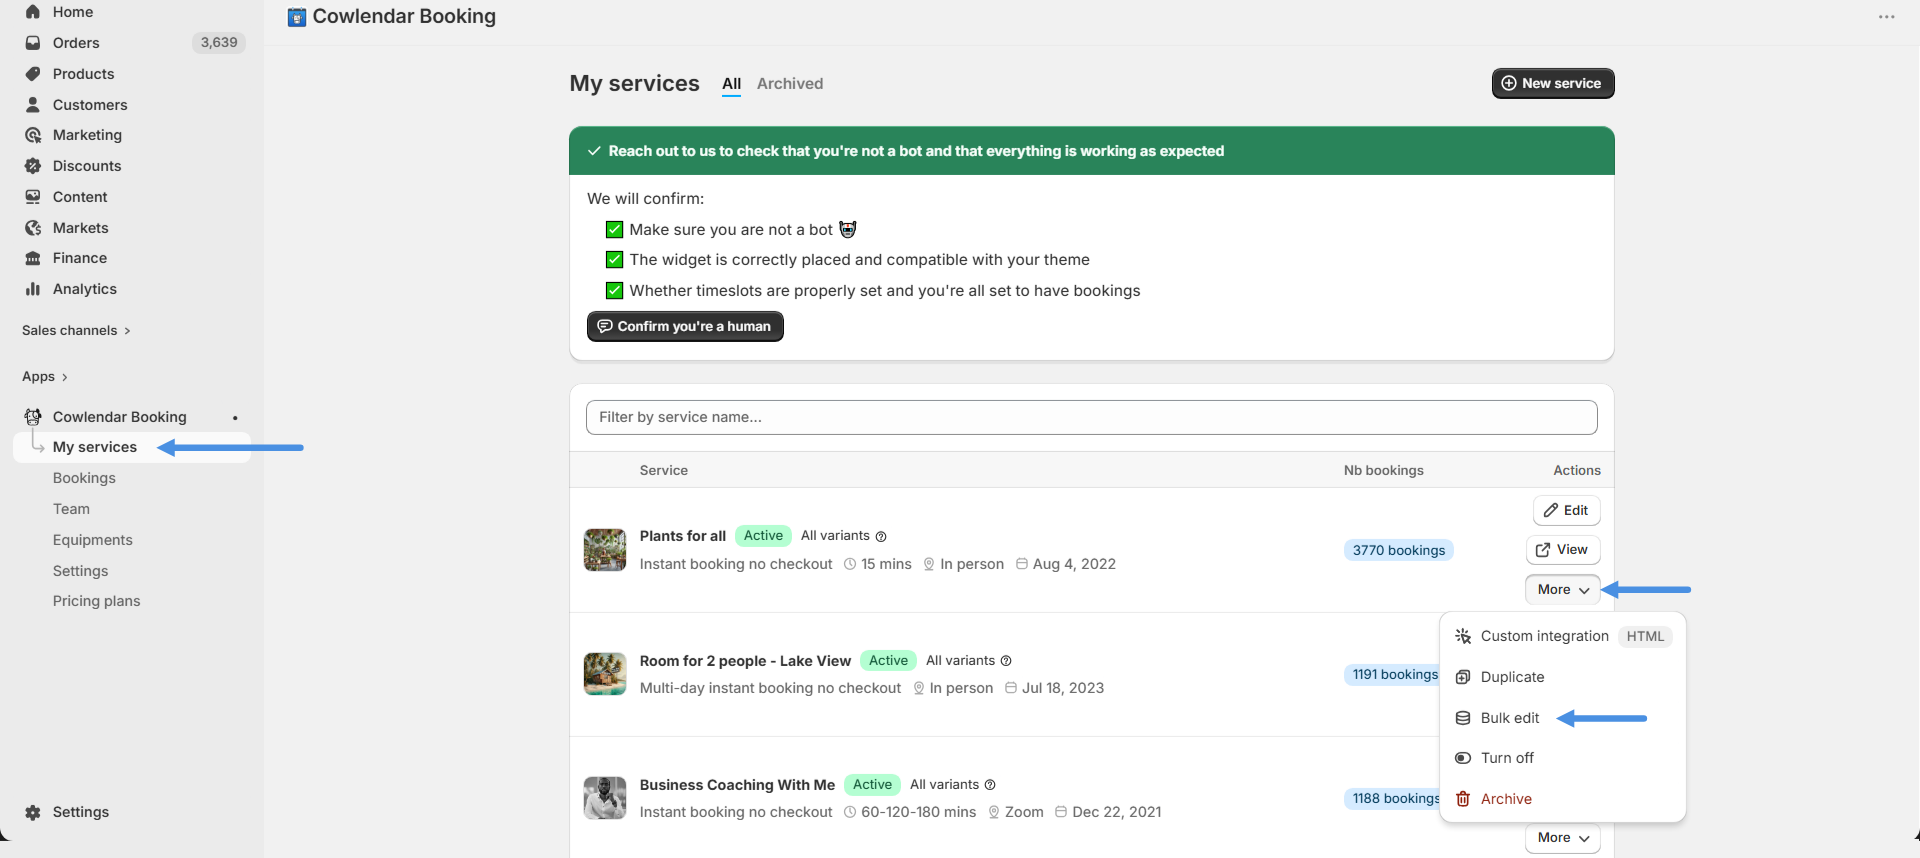
Step 2 - Open Bulk Edit from the "More" Menu
Go to My services. Find the service you want to copy settings from and click the More button on the right side of that row. A dropdown will appear with several options. Click Bulk edit.
Step 3 - Select Which Settings to Copy
A modal will open titled "Apply [Service Name] to other services". This is where you choose exactly which settings to copy.
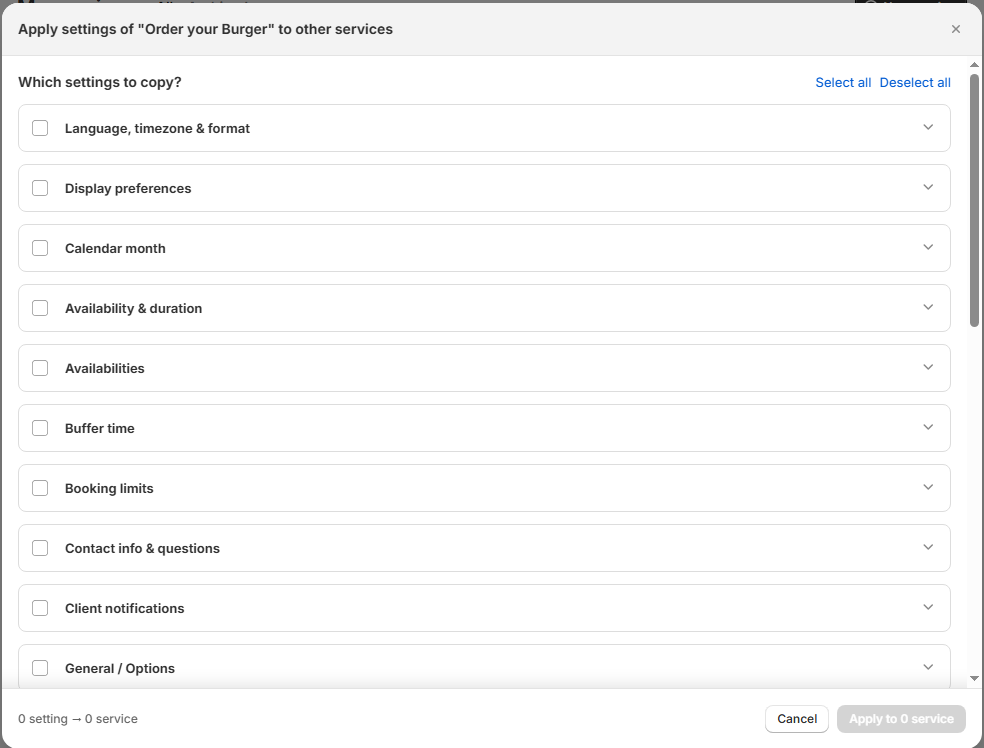
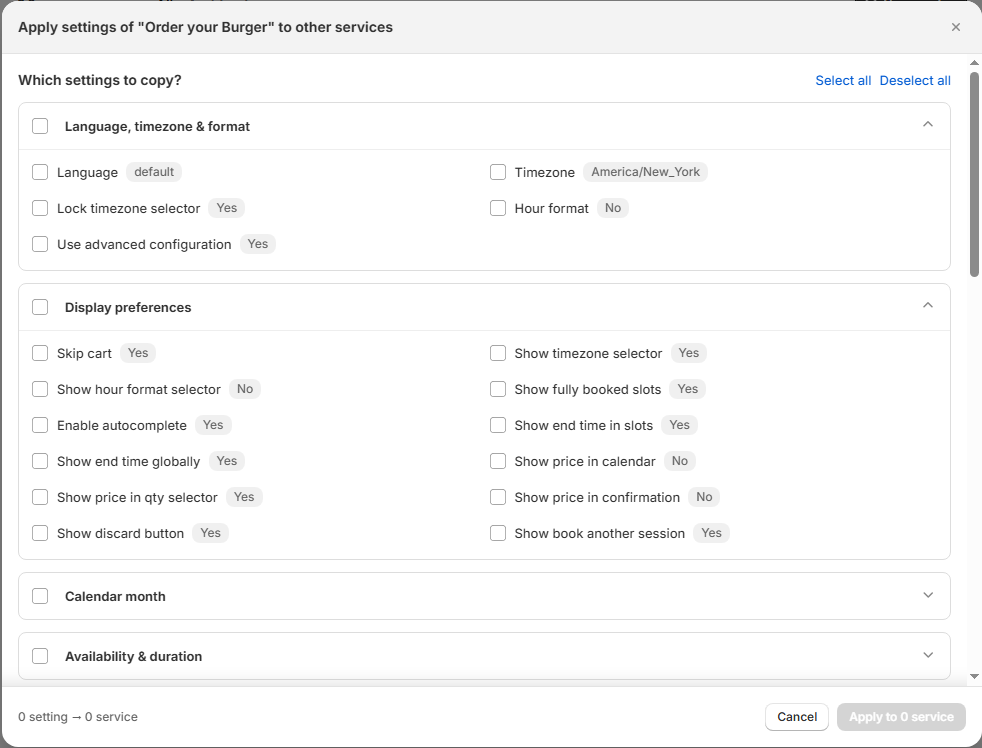
Each category can be expanded to reveal its individual settings. Check the top-level category box to copy everything inside it, or expand it and pick only the specific settings you need.
The main list of available setting categories is as follows:
| Category | What it includes |
|---|---|
| Language, timezone and format | Language, Timezone, Lock timezone selector, Hour format, Use advanced configuration |
| Display preferences | Skip cart, Show timezone selector, Show fully booked slots, Show end time in slots, Show price in calendar, Show price in confirmation, Show book another session, and more |
| Calendar month | First available date vs current month |
| Availability and duration | Durations, Minimum scheduling notice, Look ahead period, Custom slot step |
| Availabilities | Link same teammates |
| Buffer time | Buffer type and related settings |
| Booking limits | Booking limit per day |
| Contact info and questions | Contact info to ask, Ask confirmation email, Phone label, Phone default country, Custom questions |
| Client notifications | Send confirmation by, Send reschedule by, Send cancellation by, Send reminder by, Email reminders |
| General / Options | Custom email text, Show cancel in emails, Min rescheduling notice, Slot lock settings, Remove expired from cart, Show countdown in cart |
| Meeting location | Meeting location, Location description, Unique meeting link |
| Design | Show service image, Use product image, "Pick your time" text |
| Confirm / Decline | Manual booking confirmation |
| Waitlist | Enable waitlist, Show waitlist on fully booked slots |
| Post booking notification | Post booking notification |
| Upsell | Upsell products and services |
| Pre-payment | Pre-payment settings |
| Subscriptions | Enable subscriptions, Default purchase plan selection, Allow single purchase, Subscription plans |
| Google events | Google event title |
Step 4 - Choose Which Services to Apply the Changes To
Scroll down in the modal to the "Apply to these services" section. You will see a grid of all your other services. Check the ones you want to update.
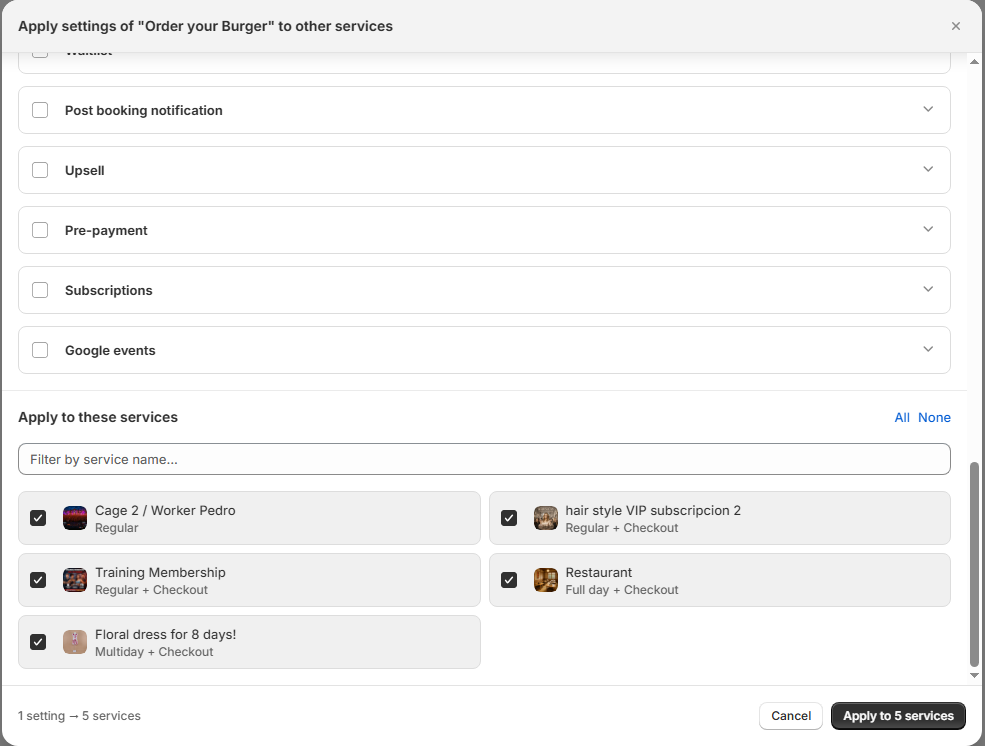
Use the All shortcut to select every service at once, or use the Filter by service name field to find specific ones quickly.
The counter at the bottom of the modal updates in real time to show exactly how many settings and how many services will be affected before you confirm.
Step 5 - Click "Apply to X services"
Once you have selected your settings and your target services, click Apply to \[number] services in the bottom-right corner. The changes are applied immediately.
Important Notes
Best Practices
Set up one service perfectly before bulk editing. The best workflow is to build and test one service thoroughly, then use bulk edit to push those settings to the rest. Bulk editing from a half-configured service will spread incomplete settings across your catalog.
Use category-level checkboxes for speed, individual checkboxes for precision. If you want to copy everything inside Client notifications, check the top-level box. If you only need one specific setting from that group, expand the category and check just that one.
Filter your services before selecting. If you have many services and only want to update a subset, use the filter field instead of scrolling through the full list. It saves time and reduces the chance of accidentally including the wrong service.