<br>
Why Creating Custom Service Lists Matters
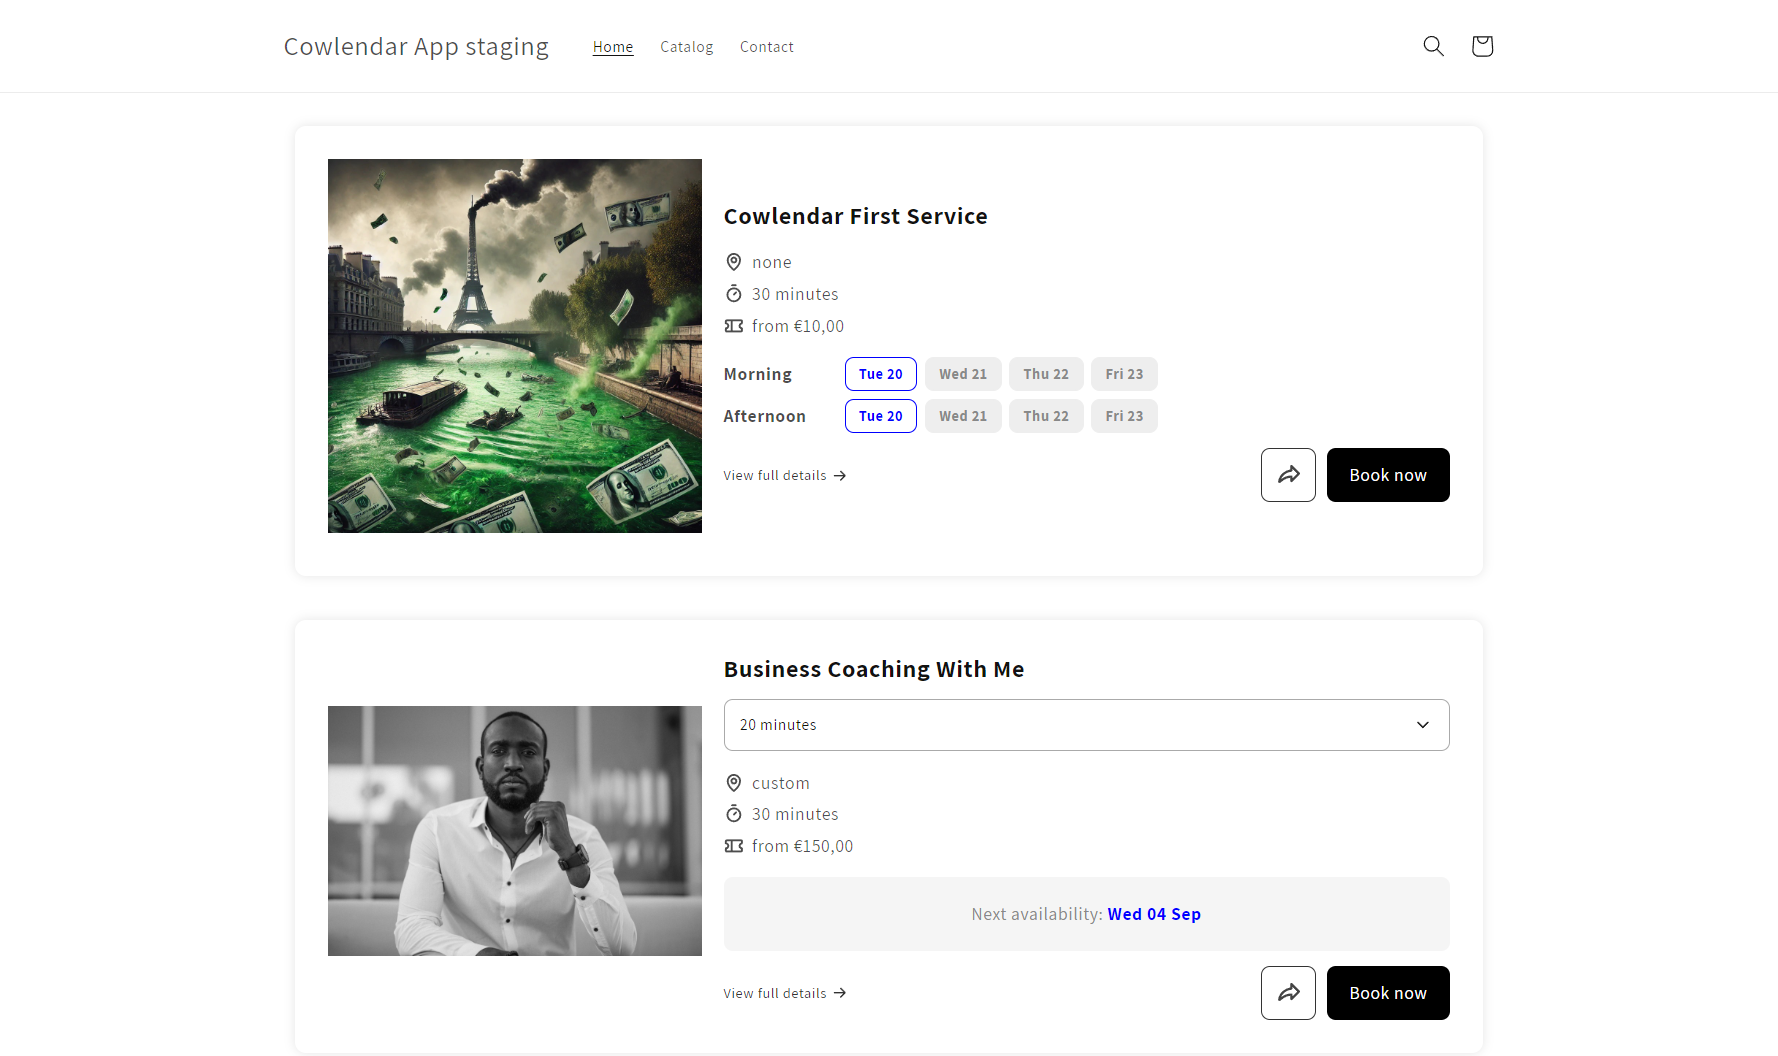
The Service List feature gives you more flexibility and control over how and where your services are displayed.\
By creating different service lists, you can easily assign specific services to specific pages or sections of your Shopify store.\
This allows you to tailor the booking experience based on your business needs, improve customer navigation, and showcase only the services you want on each page.\
It is a great way to increase personalization and create a cleaner, more effective booking process for your customers.
Steps to create a new list and add it to any page of your store
In your Shopify admin dashboard click on the Apps tab
Click on Cowlendar
Click on Settings
Inside of Settings click on Service List Page
Click on Create a new list
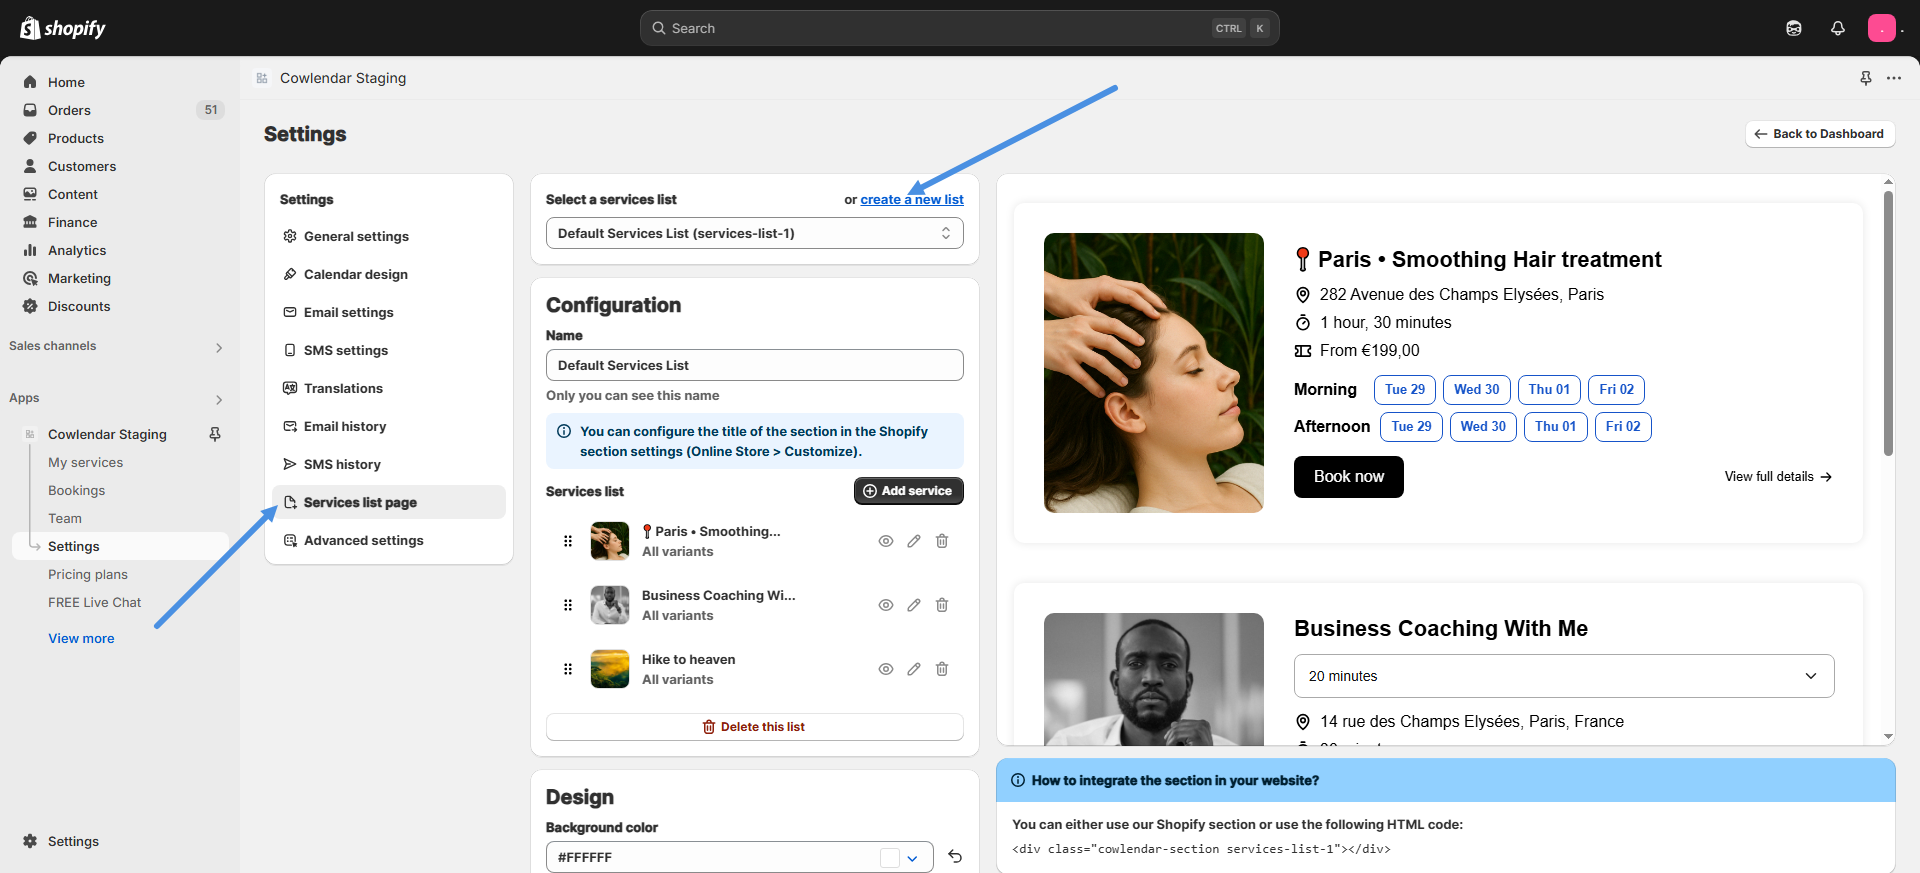
Click Save
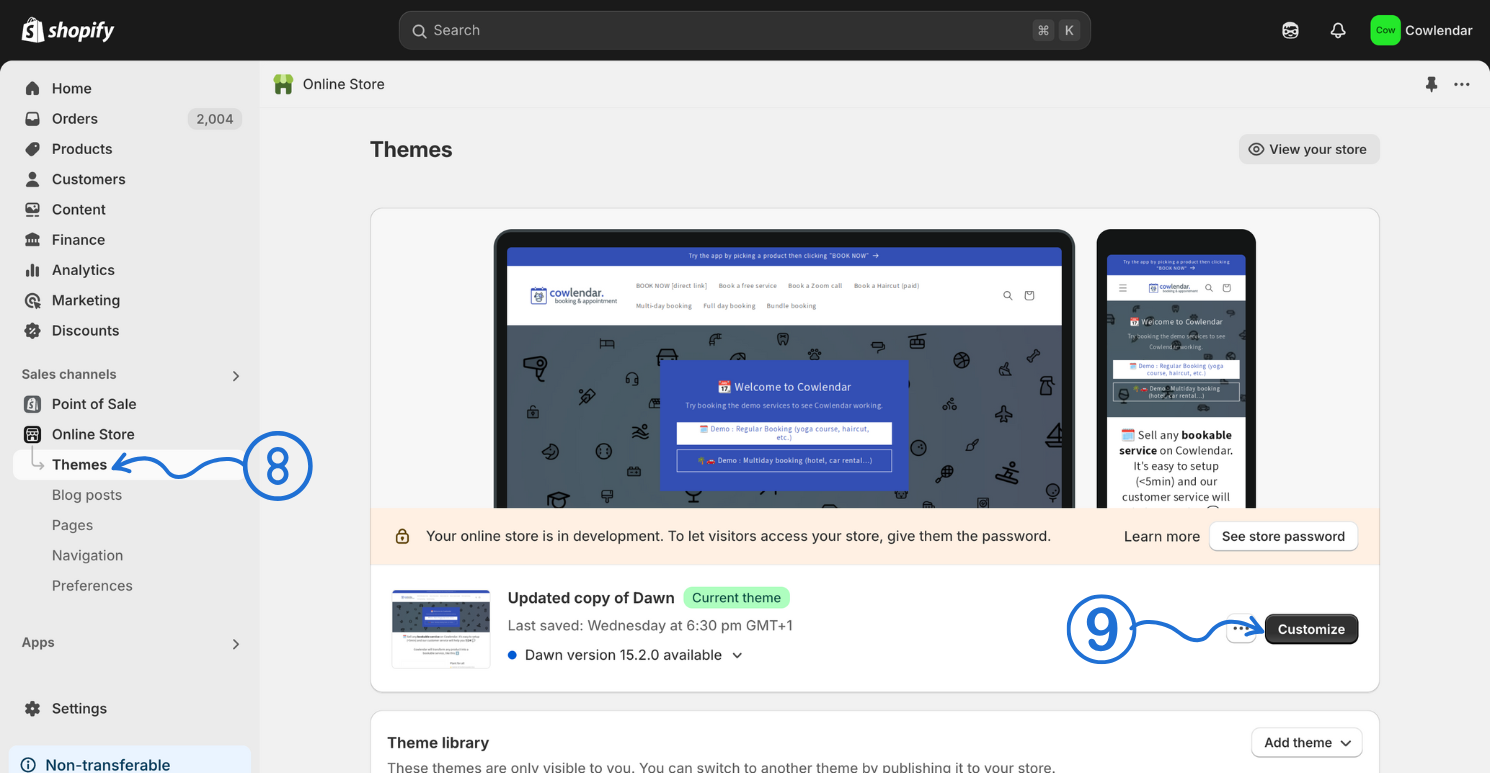
Look at the Shopify admin panel on the left side and click on Online store
Click on Themes
Click on Customize to enter the theme editor
In the theme editor you will go to the page you want to add the service list to
On that page click on Add section
Click on Apps and find Cowlendar Services
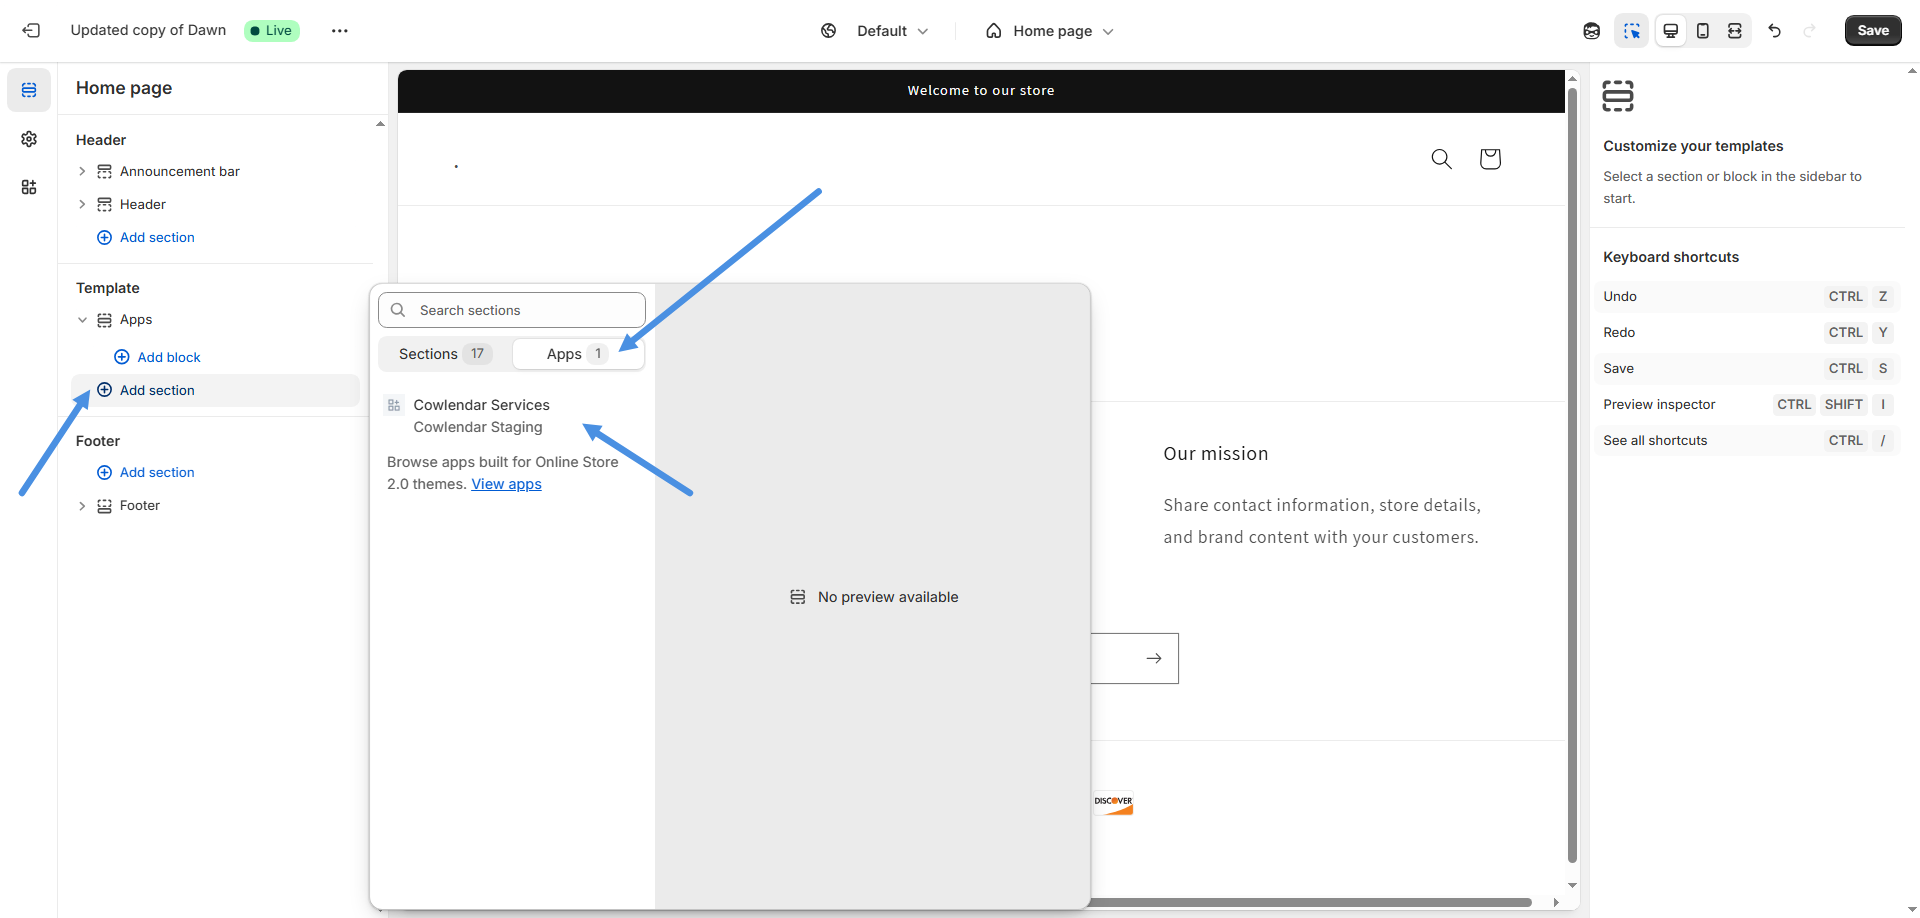
Once you have added Cowlendar Services, select it, and on the right side and you will see the Section Type option
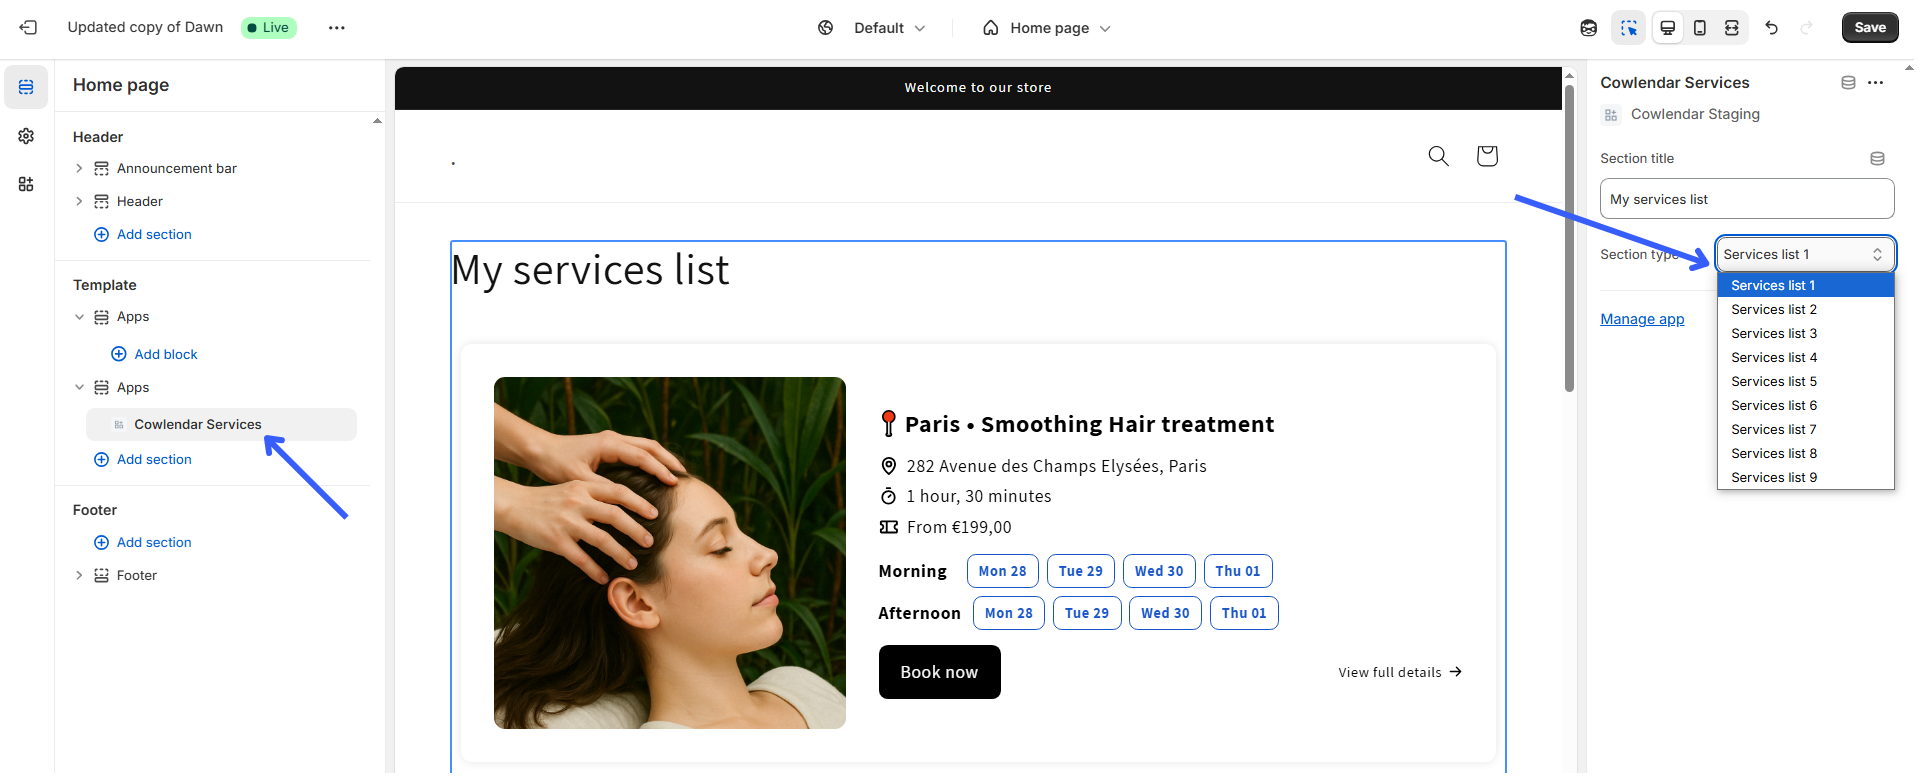
Select the list you want to display and click Save.